
DIY Baby Passport Photos: Home Photography Guide
Learn how to take perfect passport photos for babies and children at home with our expert tips and AI tools. Save time and avoid rejections!
Passport photos for babies and young children can be a challenging endeavor for parents. Between strict government requirements and the unpredictable nature of kids, what should be a simple task often becomes a frustrating experience. However, with the right preparation, techniques, and tools like id-photo.ai, you can successfully capture perfect passport photos at home, saving time and money while avoiding the stress of studio visits.
Why Taking Children’s Passport Photos at Home Makes Sense
Taking passport photos at home offers several advantages when dealing with babies and young children:
- Familiar Environment: Children are more comfortable and cooperative in their own space
- Flexible Timing: You can work around nap times, feeding schedules, and mood swings
- Multiple Attempts: No pressure from waiting customers or time constraints
- Cost Savings: Avoid professional photography fees, especially if multiple attempts are needed
- Immediate Results: See results instantly and retake if necessary
Understanding Official Requirements for Children’s Passport Photos
General Requirements for All Ages
All passport photos, regardless of age, must meet these basic requirements:
- Size: 45mm high by 35mm wide
- Color photograph taken within the last 6 months
- Plain cream or light grey background
- Head size: 29-34mm from crown of head to bottom of chin
- Neutral expression or natural look
- Both eyes open and visible
- No shadows on face or background
Special Considerations for Babies and Children
Her Majesty’s Passport Office recognizes that photographing children presents unique challenges and allows some flexibility:
- For infants: Eyes don’t need to be open if the child is naturally sleeping
- Head support: A parent’s hand may be visible if necessary for support, but should be minimized
- Expression: Natural expressions are acceptable; forced smiles are not required
- Positioning: The child should be looking directly at the camera when possible
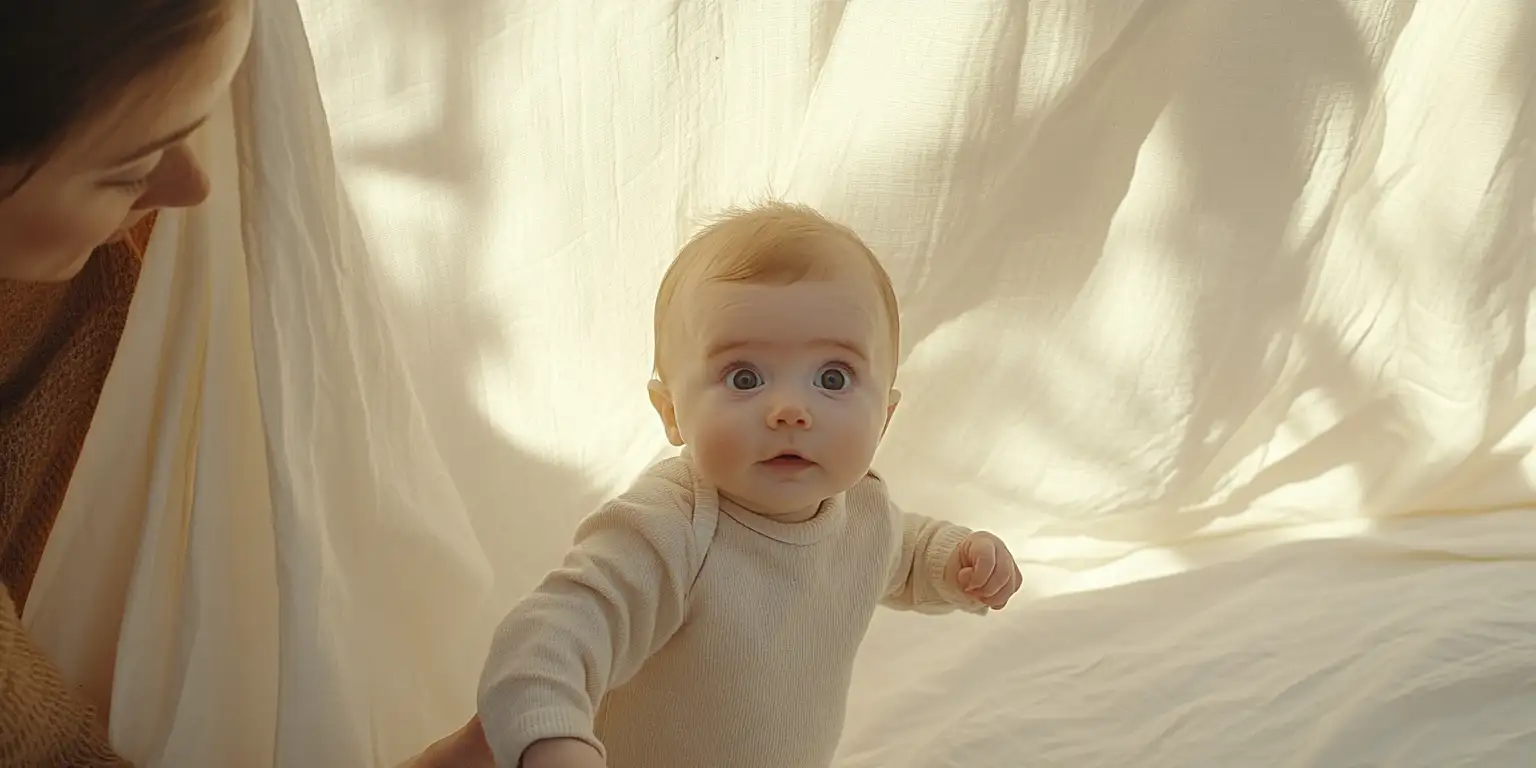
- Background assistance: A parent may hold a white sheet behind the child if needed
- Children under 6: Do not need to look directly at the camera or have a neutral expression
- Children under 1: Do not need to have their eyes open
Essential Equipment for Taking Passport Photos at Home
You don’t need professional equipment, but having the right tools helps:
- Smartphone or digital camera: For capturing the image
- Tripod or stable surface: To keep the camera steady
- Natural lighting: Position near a window for even, soft light
- Cream or light grey backdrop: A sheet or large piece of paper
- White blanket or sheet: For photographing infants
- AI verification tool: Like id-photo.ai to ensure compliance
Step-by-Step Guide to Photographing Babies
Preparing for the Photo Session
Timing is crucial when photographing babies:
- Choose a time when your baby is well-rested and fed
- Avoid peak fussiness periods
- Have everything ready before starting
- Work quickly but patiently
Setting Up the Perfect Environment
Create an ideal photography space:
- Choose a well-lit room with natural light from a window
- Set up a cream or light grey background
- Place a white blanket or sheet on the floor or a raised surface
- Ensure the temperature is comfortable for your baby
Photographing Techniques for Babies
Different approaches work for different ages:
For Newborns (0-3 months)
- Positioning: Place baby on their back on a white blanket
- Support: Use rolled towels or your hand to support the head gently
- Camera angle: Shoot from above, looking down at the baby
- Background: Ensure the white blanket fills the frame behind the baby
- Expression: Baby can be sleeping; eyes don’t need to be open
For Infants (3-12 months)
- Positioning: Still use the white blanket method
- Interaction: Use toys or rattles to get the baby’s attention
- Multiple angles: Take several photos from different positions
- Parent involvement: You can be in the photo if needed for support, but minimize your presence
Tips for Success with Babies
- Quick sessions: Babies lose interest quickly, so work efficiently
- Natural expressions: Don’t force smiles; natural expressions are acceptable
- Safety first: Never leave baby unattended during the session
- Comfort items: Allow pacifiers if they help keep baby calm
Photographing Toddlers and Young Children
Age-Appropriate Techniques
For Toddlers (1-3 years)
- Engagement: Use toys, books, or songs to keep them interested
- Positioning: Have them stand or sit on a chair
- Direction: Give simple, clear instructions
- Rewards: Use stickers or praise as positive reinforcement
For Preschoolers (3-5 years)
- Explanation: Tell them it’s like taking a “serious selfie”
- Demonstration: Show them what to do by taking your own photo first
- Games: Turn it into a fun game or role-play scenario
- Choices: Let them choose between a few options
Managing Behavior During the Session
Common challenges and solutions:
- Fidgeting: Keep sessions short and engaging
- Distractions: Remove toys and other distractions from the area
- Tantrums: Have a backup plan for breaks
- Cooperation: Use positive reinforcement and patience
Technical Photography Tips
Lighting and Background Setup
- Natural light: Position near a large window for soft, even lighting
- Avoid shadows: Ensure light comes from the front, not behind
- Background: Use a cream or light grey wall or sheet
- Contrast: Ensure good contrast between the child’s skin and background
Camera Settings and Techniques
- Focus: Ensure the face is in sharp focus
- Stability: Use a tripod or brace the camera
- Multiple shots: Take many photos to ensure you get good ones
- Resolution: Use the highest resolution your camera allows
Post-Processing and Verification
Using AI Tools for Compliance
Modern AI tools make it easy to ensure your photos meet requirements:
- Automatic cropping: Precisely size the head according to UK standards
- Background verification: Check for proper cream/light grey background
- Compliance checking: Verify all requirements are met
- Corrections: Get suggestions for fixing any issues
Manual Adjustments
If you’re doing it yourself:
- Cropping: Ensure head size is between 29-34mm
- Background: Make sure it’s evenly lit and plain
- Brightness: Adjust for proper exposure
- Color balance: Ensure natural skin tones
Common Mistakes to Avoid
Baby Photography Pitfalls
- Wrong background: Using white instead of cream/light grey
- Poor lighting: Harsh shadows or uneven illumination
- Wrong size: Not meeting the 45mm x 35mm requirement
- Including parents: Having adults visible in the photo
- Forced expressions: Trying to make babies smile unnaturally
Technical Errors
- Blurry photos: Camera shake or poor focus
- Wrong dimensions: Head too small or too large
- Shadows: Dark areas on face or background
- Red eye: Not correcting red-eye effects
When to Seek Professional Help
While home photography is often successful, professional help may be needed for:
- Multiple children: Managing several kids at once
- Special needs: Children with unique requirements
- Tight deadlines: When you need photos urgently
- Previous rejections: If home attempts have been unsuccessful
Legal and Documentation Considerations
Age-Related Validity
Remember UK passport validity periods:
- Children under 16: Passport valid for 5 years
- Adults: Passport valid for 10 years
- Renewal timing: Plan photo sessions accordingly
Supporting Documentation
For special circumstances:
- Medical conditions: May require doctor’s note
- Religious requirements: Documentation for head coverings
- Special accommodations: Formal requests for flexibility
Conclusion
Taking passport photos for babies and children at home can be challenging, but with patience, preparation, and the right tools, it’s entirely achievable. The key is understanding the specific requirements, creating a comfortable environment for your child, and using technology like id-photo.ai to ensure compliance.
Remember, the goal is to capture your child’s natural appearance in a way that meets official standards. With practice and the right approach, you can successfully complete this important step in your family’s travel preparations.
Ready to create your passport photo?
Get your perfect passport photo in minutes with our AI-powered tool. Create Photo Now